Bringing Easter to Life: A Guide to Using 3D SVG Files for Cutting Machines
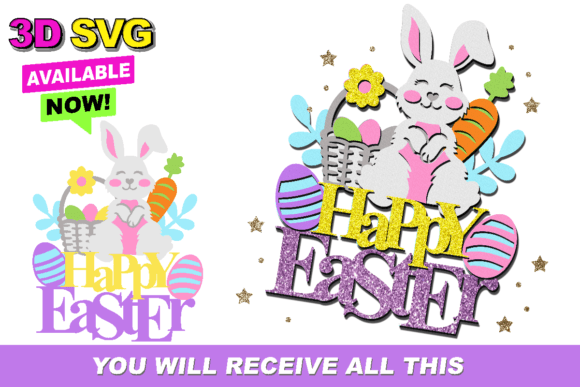
The arrival of spring often sparks a surge of creativity, particularly as we approach the Easter holiday. For crafters, small business owners, and DIY enthusiasts, this season is an opportunity to create unique decorations, personalized gifts, and festive merchandise. In recent years, the digital crafting landscape has evolved significantly, moving beyond flat decals and simple vinyl cuts to more dimensional projects. At the forefront of this trend is the Easter 3D SVG, a file format designed to add depth and texture to your creations. Whether you are a seasoned professional or a hobbyist just starting out, understanding how to leverage these files can transform your project outcomes.
Understanding the Dimensional Difference
Traditional SVG (Scalable Vector Graphics) files are excellent for two-dimensional designs. They work perfectly for stickers, t-shirt transfers, and flat signs. However, an Easter 3D SVG takes this concept further. These files are engineered with multiple layers that, when cut from materials like cardstock, foam board, or layered vinyl, create a shadow box effect or a pop-up structure. The result is a design that literally jumps off the page, offering a tactile experience that flat images cannot match.
The core purpose of these files is to simplify the complex process of layering. Instead of manually designing each tier of a bunny's ear or the petals of a lily, the creator has already mapped out the spacing and alignment for you. This allows you to focus on material selection and assembly rather than intricate vector math. The value lies in the time saved and the professional finish achieved, even by those with limited design software experience.
Key Features and Characteristics
When you download an Easter 3D SVG, you are typically receiving a package containing several distinct elements. Unlike a standard image file, these SVGs contain specific cut lines for each layer of the design. Key characteristics often include:
- Pre-calculated Spacing: The layers are offset precisely to ensure that when stacked, they create a uniform depth without gaps or misalignment.
- Registration Marks: Many high-quality files include marks to help you align your cuts if you are using a printer-cut workflow.
- Modular Components: Complex designs, such as a 3D Easter basket or a standing egg, are often broken down into interlocking pieces that assemble without glue, though adhesive is usually recommended for stability.
- Scalability: Because they are vector-based, you can resize the entire assembly from a tiny cupcake topper to a large door hanger without losing resolution.
Compatibility with Cutting Software
One of the most common questions regarding digital assets is compatibility. The good news is that an Easter 3D SVG is highly versatile. These files are natively supported by industry-standard software such as Silhouette Studio and Cricut Design Space. This makes them incredibly easy to cut for users of Silhouette Cameo, Portrait, or Cricut Maker and Explore machines.
The workflow is generally straightforward. You import the file into your software, ungroup the layers if necessary, and assign different colors to each layer to visualize the stacking order. Then, you send the design to your machine. However, if you are using a different type of cutting machine—such as those from Brother ScanNCut, Sizzix Eclipse, or generic CNC plotters—it is crucial to ensure your specific hardware and software ecosystem can interpret SVG files correctly. While SVG is a universal web standard, some older or proprietary machines may require conversion to DXF or a specific brand format. Always verify your machine's capabilities before purchasing or downloading to avoid frustration during your crafting session.
Practical Applications and Real-World Scenarios
The versatility of Easter 3D SVG files means they fit into a wide array of projects. Here are a few scenarios where these files shine:
- Home Decor: Create stunning shadow boxes featuring Easter bunnies, chicks, or religious symbols. When framed, these make excellent seasonal wall art that can be stored and reused year after year.
- Greeting Cards: Move beyond the flat card. Use a 3D SVG to create a pop-up element inside a handmade greeting card. When the recipient opens the envelope, a dimensional egg or flower springs to life.
- Party Favors and Treat Boxes: Small business owners can utilize these designs to create custom packaging. Imagine a treat box shaped like a 3D carrot or a bunny head, filled with chocolates or jelly beans. This adds a premium feel to party favors or retail products.
- Educational Crafts: Teachers and parents can use simpler 3D designs for classroom activities. Assembling a 3D paper egg helps children develop fine motor skills and understand spatial relationships.
Evaluating Suitability for Your Project
While the appeal of 3D crafting is strong, it is important to evaluate whether an Easter 3D SVG is the right choice for your specific needs. Not every project benefits from added dimension. If you are looking for a quick, last-minute decoration that needs to adhere smoothly to a curved surface like a mug or a wine glass, a flat vinyl decal might be more practical. 3D paper crafts generally require a stable, flat surface or a dedicated display area.
Furthermore, consider the material costs. 3D projects consume more material than their 2D counterparts because you are cutting multiple layers for a single image. If you are working with expensive specialty papers or metallic cardstocks, calculate your yield beforehand. On the other hand, if durability and visual impact are your primary goals, the extra material cost is often justified by the superior end result.
Strengths and Limitations
The primary strength of using a pre-made Easter 3D SVG is consistency. Because the layers are digitally perfected, every cut you make will align perfectly, ensuring a professional look every time. This eliminates the trial-and-error phase of trying to manually offset layers in design software. Additionally, these files allow for rapid prototyping; you can test a design in cheap copy paper before committing to your final material.
However, there are limitations to consider. Assembly time is significantly higher for 3D projects. Cutting might take only a few minutes, but folding, gluing, and stacking the layers can take thirty minutes or more per item. For high-volume production runs, this labor intensity must be factored into your pricing or timeline. Also, 3D paper crafts are generally more fragile than flat vinyl. They can be susceptible to crushing if not handled carefully or stored in rigid containers.
Tips for Success
To get the most out of your Easter 3D SVG experience, keep the following tips in mind:
- Choose the Right Weight: Use cardstock that is heavy enough to hold its shape but light enough for your machine to cut cleanly. 65lb to 80lb cardstock is often the sweet spot for most 3D structures.
- Test Cuts: Always perform a small test cut on a scrap piece of your intended material to check blade pressure and cutting depth.
- Adhesive Selection: Use foam tape between layers to enhance the 3D effect, or use liquid glue for seamless joints. Avoid wet glues on thin paper to prevent warping.
- Organization: Since 3D files involve many small pieces, label your mats or keep your cut pieces organized by layer color to streamline the assembly process.
In conclusion, integrating an Easter 3D SVG into your workflow opens up a world of creative possibilities. Whether you are enhancing your home decor, expanding your product line, or simply enjoying a relaxing crafting session, these files provide the structure needed to build something truly special. By understanding the features, compatibility requirements, and practical applications, you can confidently select the right designs and execute them flawlessly. As you prepare for the holiday, remember that the magic of Easter often lies in the details, and few things add detail quite like the depth and dimension of a well-crafted 3D project.